A handmade notebook decorated with embroidery is a good idea for a New Year's gift (and for a gift in general).
Such embroidery can also decorate finished notebooks with a not too thick cover. But let's start with a do-it-yourself notebook master class: you can make it from ordinary office paper or pick up sheets of craft or colored paper. For the cover, it is better to take a denser material, for example, colored cardboard.
How to make a notebook out of office paper with a cover: master class

You will need:
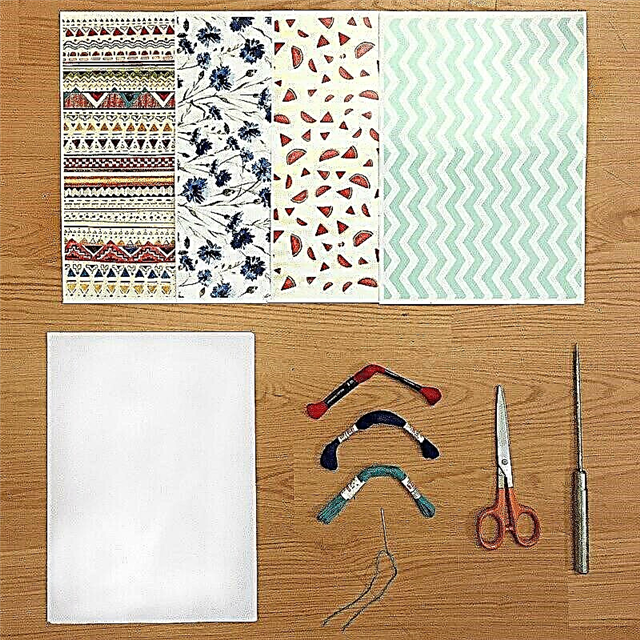
- sheets of paper;
- cardboard or thick paper for cover;
- floss;
- awl;
- a large needle;
- Ruler and pencil;
- scissors.
Creative Notebook by Burda
Step 1

If you want to make an A5 notebook, take A4 sheets of plain office paper. If you need a smaller notebook, cut A4 sheets in half. From cardboard or thick paper, cut out the cover of the same size as the sheets. Fold the sheets and cover in half, put the sheets in the cover.
Step 2

Open the sheets, outline several points on the fold (a notebook will be stitched in them) and pierce the points with an awl.
Step 3

Sew notepad. Use floss or other thick beautiful threads. Sew the needle through the holes forward, first in one direction, then back. Tie the ends of the thread and cut. Notepad is ready.

Photo and source: blogofthethings.com
How to make a cover for a notebook from felt
Now you can go to the cover decoration.
How to decorate a notebook cover with embroidery: a master class
You will need:
- notebook with a cardboard cover;
- paper and pencil for sketch;
- Awl or push pin with a round tip;
- a floss or other thread suitable for embroidery;
- a large needle;
- scissors;
- cork board or other substrate, so as not to damage the working surface, working with an awl;
- masking tape.
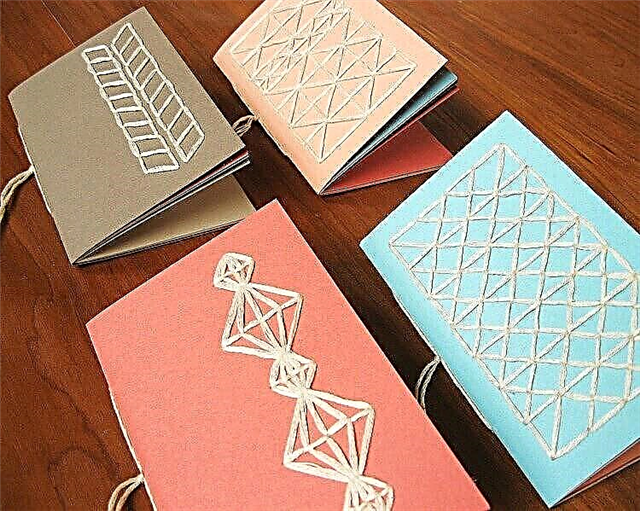
Step 1

Select or design a picture and print it or draw on a sheet of paper the size of the size of the cover. The pattern should be divided into stitches.
Step 2

Carefully align the sheet with the sketch and the cover (bend the second cover and sheets) and attach the entire structure to the cork board.
Step 3

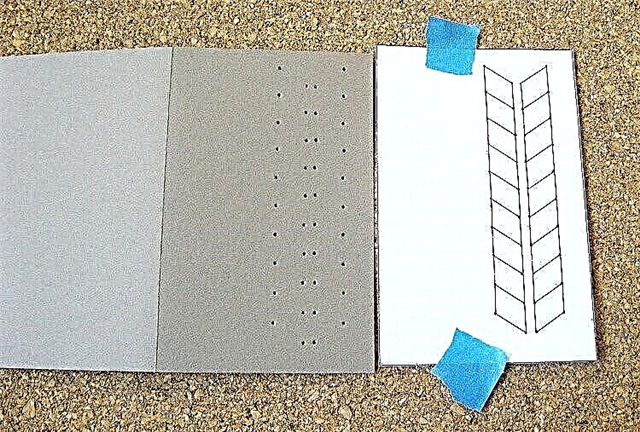
With an awl or button, make holes for future embroidery.
Step 4
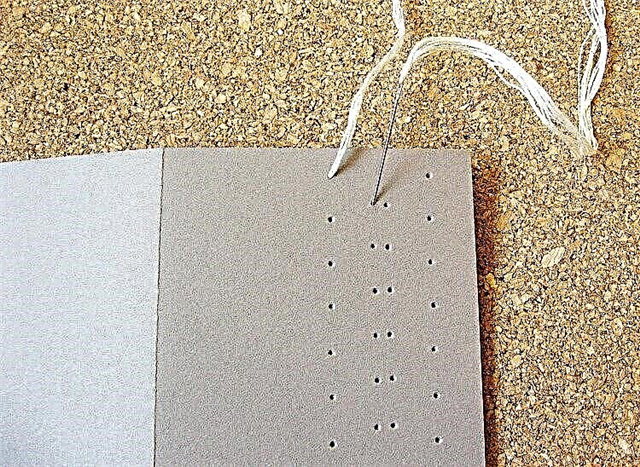


You can start embroidering. It is important that the back of the embroidery looks neat, so pay attention to how the ends of the threads are fixed.
Step 5


Continue embroidering until you finish the pattern. Done!

Photo and source: howdidyoumakethis.com
Other options for embroidery on notebooks:

Photo: lanaredstudio.com

Photo: makeandfable.com

Photo: lenopard.blogspot.com

Photo: weheartit.com

Photo: pastemagazine.com

Photo: thisiscolossal.com

Photo: hgtv.com

Photo: knitsandbrew.com

Photo: tonibest.com

Photo: theplumednest.com